First, you will need an AdWords account. Go to https://ads.google.com/home/ to sign up.
Overview
Once you log into your account you will be prompted to an overview tab. The overview tab allows you to see everything you have been doing from clicks, to impressions, to average CPC and cost. This will allow you to hover down to the next tab which is the "campaigns tab". Click on the campaigns tab.
Campaigns
After clicking on "campaigns" there will be a blue "+" sign near the middle of the tabs. Click on the blue "+" sign and it will ask you if you want to create a "new campaign" or "load campaign settings". Click on "new campaign".
Selecting A Goal
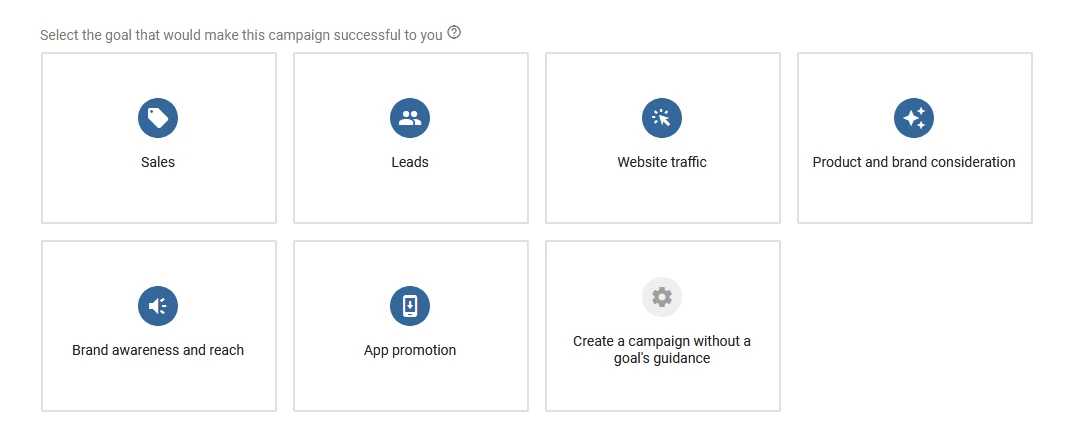
After you have clicked on "new campaign" you will be prompted to a "goals" menu as shown below. The point of asking you this is to help guide you to run a successful ad using Google Ads. You can optimize to do a sales campaign, generate more leads, gain website traffic, gain product and brand consideration, gain brand awareness and reach, add promotion or create a campaign without a goal's guide. It is simplest to create a campaign without a goal's guide. The reason for this is that Google takes away certain features when you choose a goal, so click "create a campaign without a goal's guidance".
Selecting a campaign type
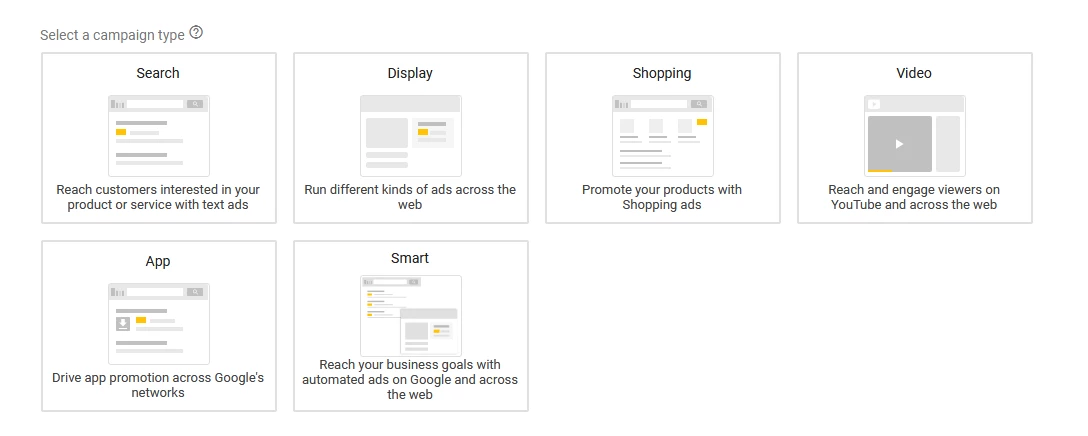
In order to run the correct type of campaign you must select a "search campaign". The reason for this is because display ads and all the other type of ads are not as effective as the search ad. What we want to do is show up whenever people search for something. Click search then hit "continue".
General Settings
Inside of general settings you will find the first part "campaign name" you need to set the campaign name to whatever you wish. Then you will be prompted to "networks". Unclick search network and display network as they won't be necessary to run a successful ad campaign. For "targeting and audiences" click United States. For languages choose "english", this part could be changed to any other language you want people to see it as. For budget input $5/day which is how much you're willing to spend. For bidding click "set a maximum cost per click bid limit", then type in $1 to save money. Right below bidding you will see a "show more settings" menu click it to expand it. Click on "ad Schedule" and you can set the day and time you want to display your ad without spending all of your money the entire day. Click on "save and continue" at the bottom.
Setting Up Ad Groups
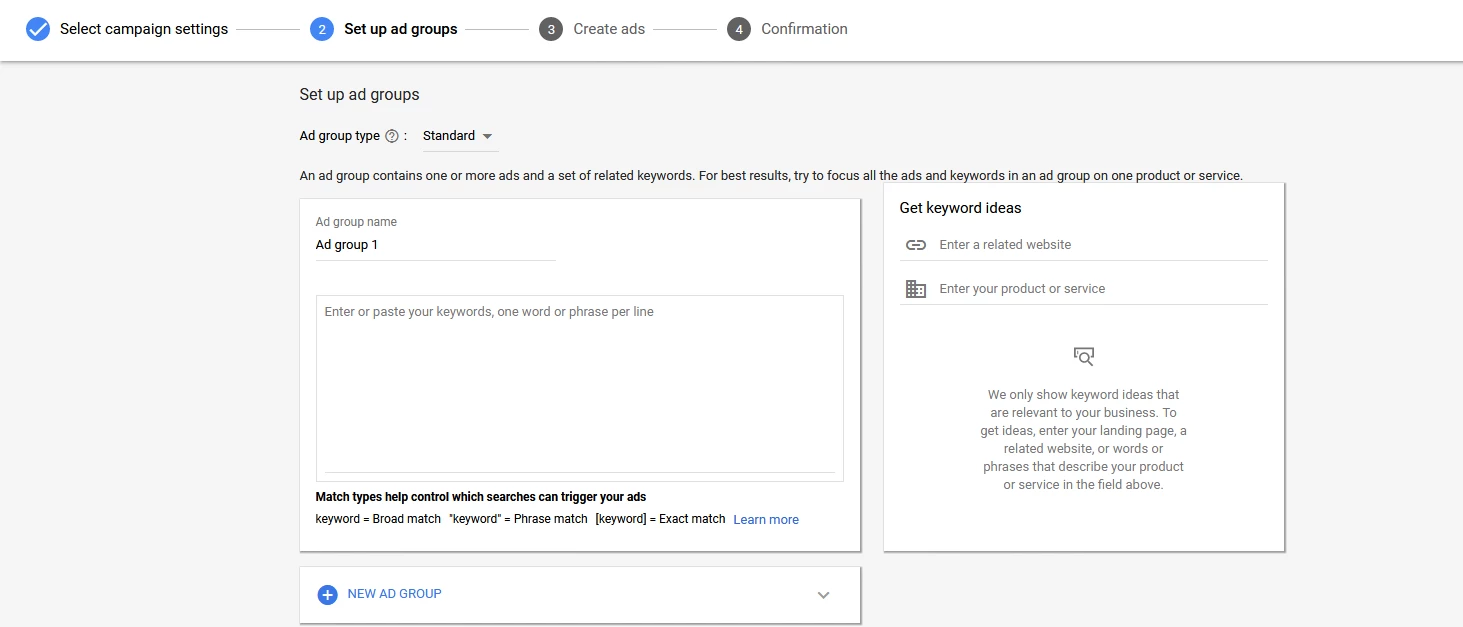
When setting up an ad group you have to first insert and ad group name. Name it anything you want. Where it says "enter or paste your keyword or phrase per line" insert different keywords. The key to using broad match, phrase match or exact match is simple. Broad match is not targeted to certain searches at all. Phrase match and exact match are more targeted. Phrase match: "digital" and "marketing" (for example) needs to be inserted in the same order. "Marketing videos for digital training" wouldn’t trigger ads while its in phrase match because its not in the same order. Exact match: if people type in "digital marketing" only, by themselves, then your ads will trigger. It will not show for anything else such as "best digital marketing". Broad modified: +digital +marketing allows for flexibility. Broad modified means that as long as these two words +digital +marketing are in the phrase, your ad will potentially trigger. Broad modified: "marketing for digital printing company" will show up. Now by itself = broad match, in quotation = phrase match, in brackets [] = exact match, in + signs = broad modified.
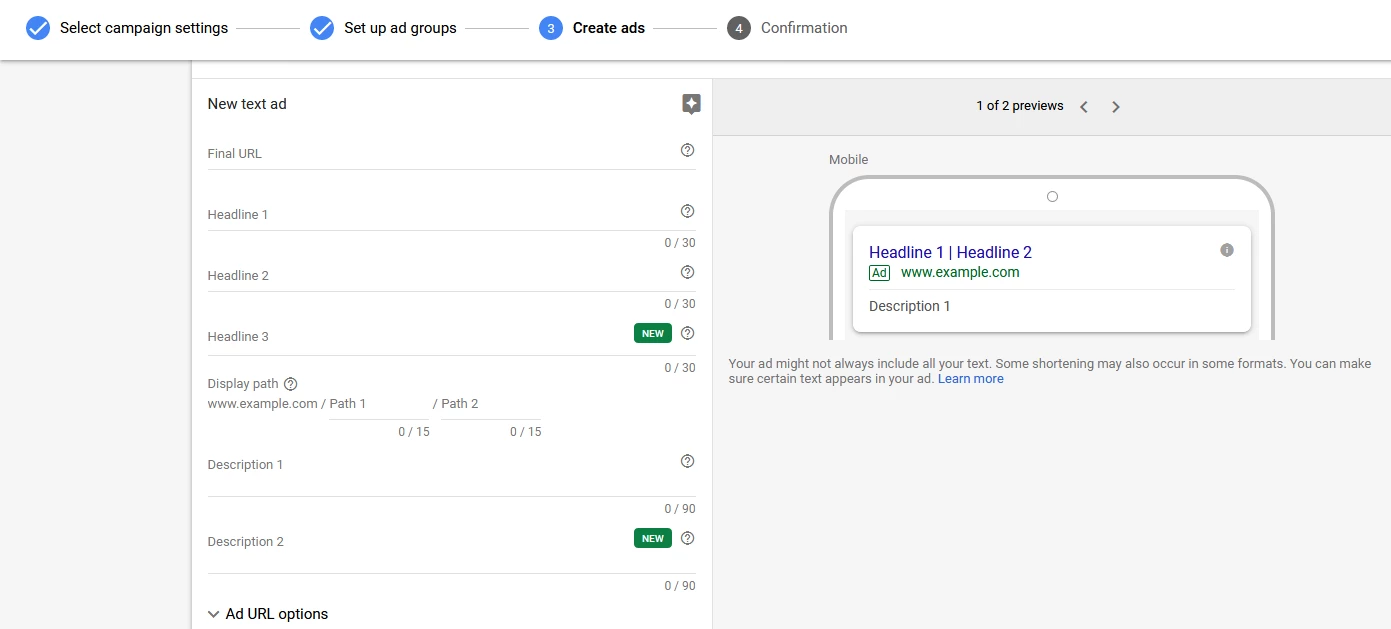
Now this is where you set up the ad itself, under step 3 "create ads". Here you will type in the "final URL" which you want people to click and go to once they click on the ad. Headline 1 creates a headline on the first part of the ad. Headline 2 creates a headline for the second part of the ad. Headline 3 creates a third headline. Skip to description. In the description explain a bit what you are trying to sell and make it interesting. Same thing goes for description 2. Then click "save and continue". Click submit in the confirmation page then you're ready.
Devices
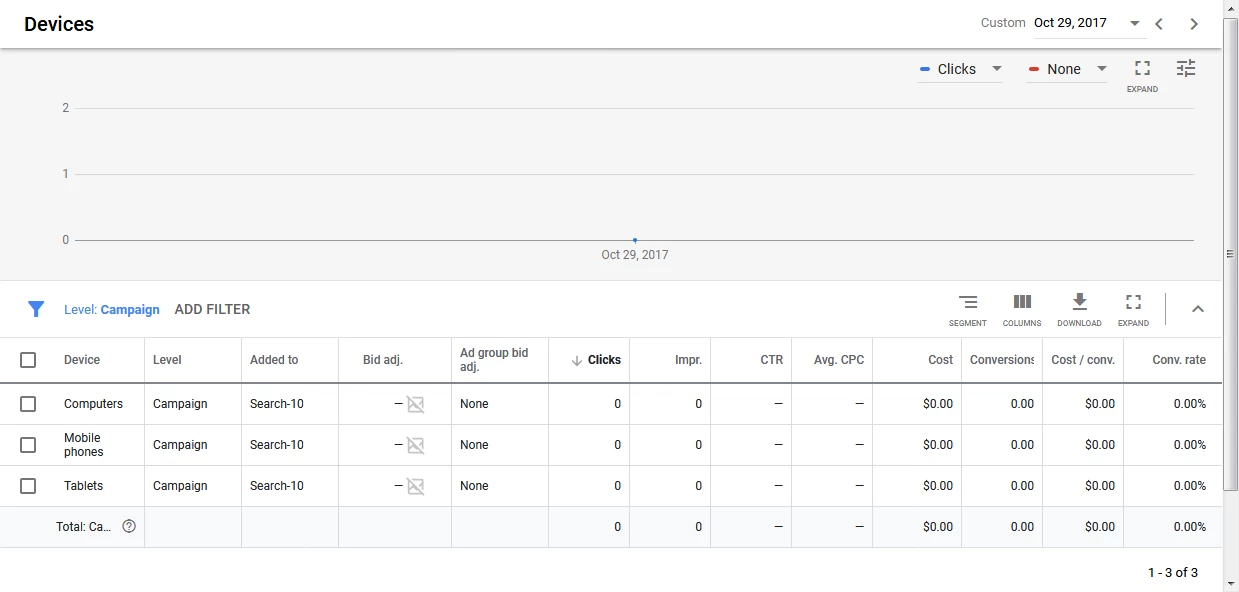
Once you return to the main page inside the devices tab you will see "bid adjustment", Adjust your bid for mobile phones and tablets to -100%. This means that you're not wasting your money on mobile phones or tablets, you are only spending money on "computers".
Pausing the Ad groups
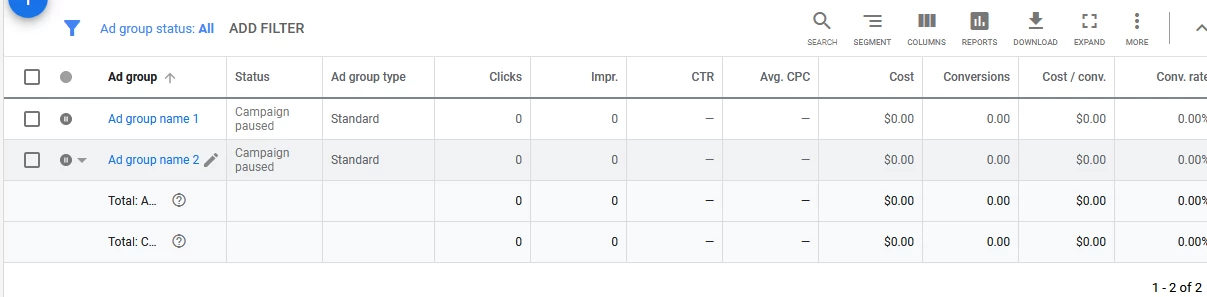
In the meantime, you will want to pause the ad groups so that you do not spend any money while it is not in use.
Negative Keywords
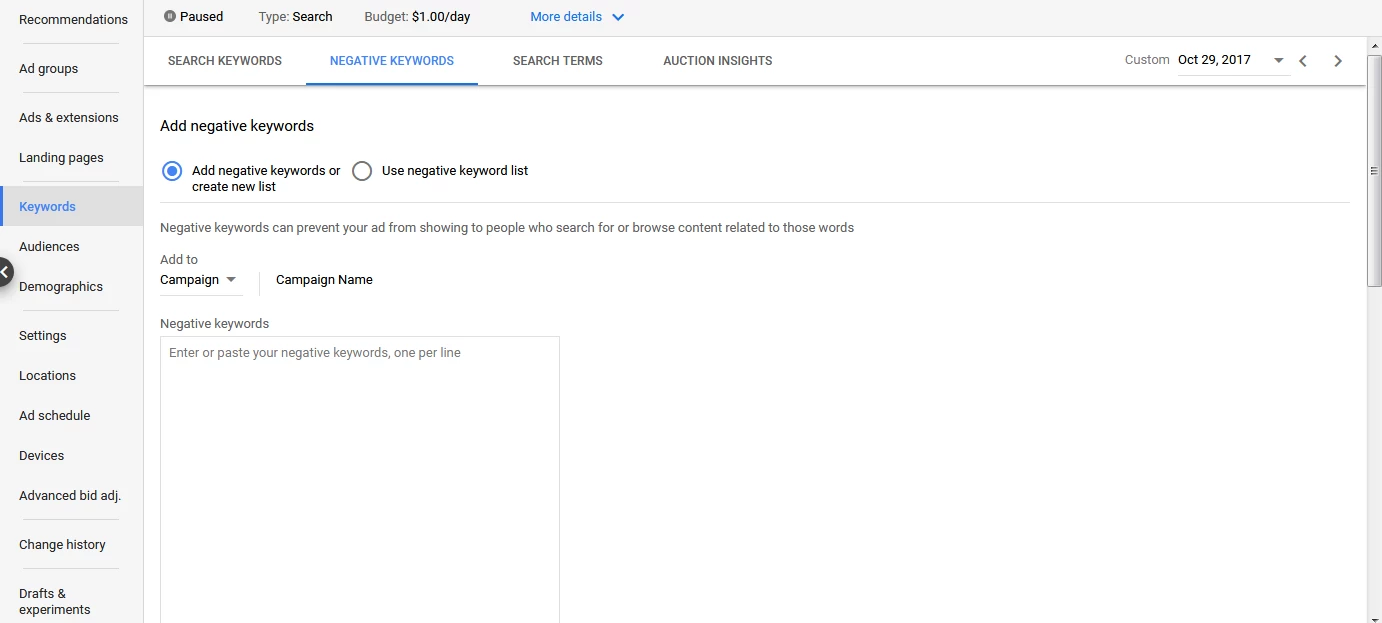
Negative keywords are good because you are telling Google when NOT to show your ad. Because if your ad were to show up on every google search, your cost would go way up and you do not want that to happen. So if you go back into the main menu and click on "keywords" you will be able to click on the "negative keywords" tab as seen below.
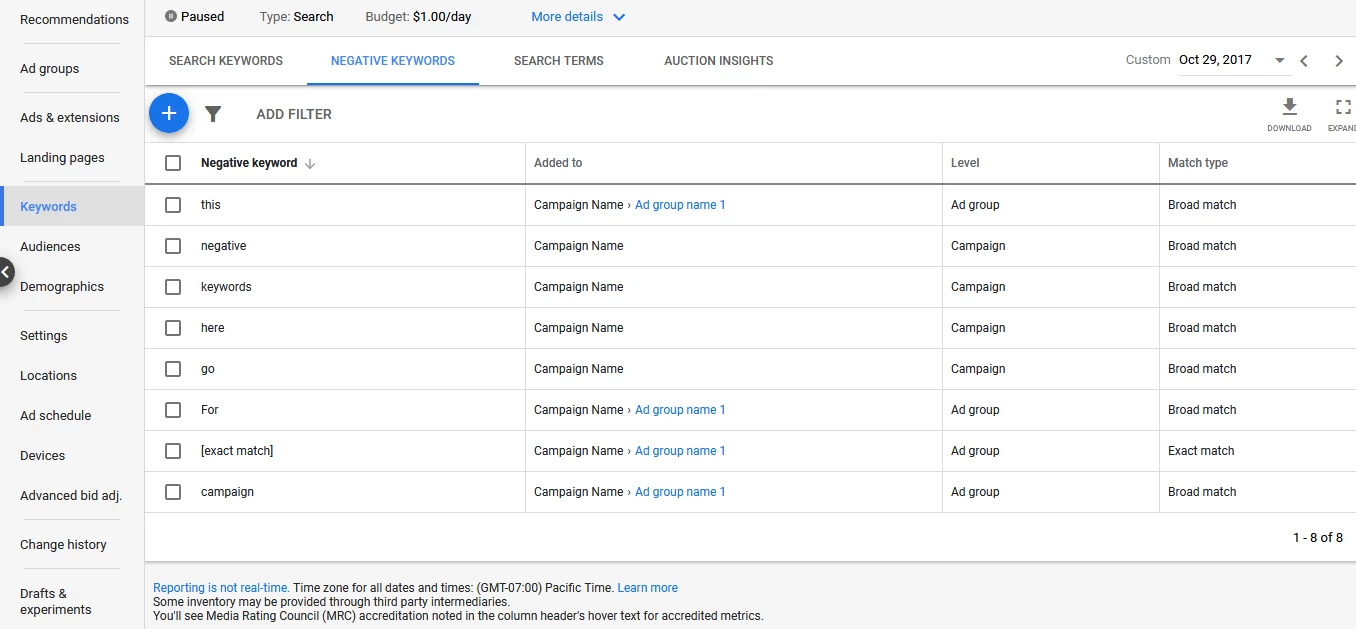
Within this tab you can start implementing negative keywords as shown below:
You could also use ubersuggest.io to find negative keywords.
Negative Keyword Lists
If you look at the top right corner, you will find the "tools and settings" tab, click on it to open the tab. Click on "negative keyword lists". Once open (shown below) you could click the blue plus button and start implementing another set of negative keywords. The benefit of a list is that you could use it in many different campaigns and many different ad groups. So you can click in the box and apply it to many different campaigns.

After clicking and highlighting in blue, you could then apply the negative keywords to whichever campaigns you would like.

Google AdWords Editor
The Google AdWords editor is an advanced feature in which you can download onto your computer. It allows you to upload and edit many different campaigns and accounts in an Excel file. It is easier to use than the main portal in AdWords.